บทความ


Im writing down this blog to share my Experience and knowledge about collaboration.
CUCM, CUC, UCCX, IM&P, SocialMiner, WebEx, Gateways, VoIP, Asterisk, Recording, QM

รายชื่อ NTP Server ในไทย

รูปภาพ
รายชื่อ NTP Server Thai สำหรับเทียบฐานเวลาในประเทศไทย Name: Address: 1st Address: 2nd ntp.ku.ac.th 158.108.212.149 th.pool.ntp.org 124.109.2.169 fw.eng.ku.ac.th 158.108.32.17 ilm.live.rmutt.ac.th 203.158.118.3 time.uni.net.th 202.28.18.72 itoml.live.rmutt.ac.th 203.158.111.32 รายชื่อ Server ที่รู้จัก แต่ไม่ได้อยู่ใน Pool delta.cpe.ku.ac.th 158.108.32.3 time.navy.mi.th 118.175.67.83 203.147.22.16 clock.nectec.or.th 202.44.204.114 203.185.67.115 time1.nimt.or.th 203.185.69.60 time2.nimt.or.th 203.185.69.59 time3.nimt.or.th 203.185.69.56 Clict-link: thailand/bangkok time

Cisco Finesse - Manage Third-Party Gadgets

รูปภาพ
Reset 3rdpartygadget Account. -   DownLoad putty Software https://www.chiark.greenend.org.uk/~sgtatham/putty/latest.html - Access the CLI on Putty and run the following command: utils reset_3rdpartygadget_password.   Uploading Finesse Sample Code. - DownLoad WINSCP Software file transfer tools: https://winscp.net/eng/downloads.php - You can Find the gadget file from url this: https://github.com/CiscoDevNet/finesse-sample-code     Customize from Finesse Administration. -Go to Desktop Layout tab, And Then put the address of the xml file .   <gadget>http:<host>/<directory>/______.xml</gadget>     If you do not see the changes after   you clear the  browser cache,   use the following CLI command to  restart the Cisco Finesse Tomcat service. admin: utils service restart Cisco Finesse Tomcat Presented by: Kittipoth@pakdeedindan.com

How to Obtain Installation Details From CUCM Certificate Information ?

รูปภาพ
How to gather the installation details from CUCM Certificate Information like Organization, Unit, Location, State and Country. -Login to Cisco Unified Communication Manager (Publisher) using CLI. -Issue commands “  show web-security  ” as shown below in the screenshot.            Now you have all the details using CLI || GUI. C  –  C ountry S  –  S tate L  –  L ocation O  –  O rganization OU  –  O rganization  U nit If you would like to change the above information in publisher, you can go ahead and do that easily as well. Login to Cisco Unified Communication Manager (Publisher) using CLI. Issue commands “ set web-security ? ”   as shown below in the screenshot. -Now change the configuration according to the requirement as per the below statement -set web-security orgunit orgname lo...

3-STEP!! CONFIGURING NTP SERVER ON WINDOWS SERVER 2019

รูปภาพ
Step 1. " Enabled  NtpServer" 1.1   Win dows+ R .  In the Run window, type  “service.msc ”  into the search box, and then hit Enter   And right-click on ‘ Windows Time ’ and select  " Stop"   1.2    Win dows+ R .  In the Run window, type “ regedit ” into the search box, and then hit Enter 1.3  Navigate to the path shown below: HKEY_LOCAL_MACHINE \ System \ CurrentControlSet \ Services \ W32Time \ TimeProviders \ NtpServer  And  Click  (left  click ) on “ Modify ”  Set the Value data to  1  and click  OK. __________________________ Step 2.   " Announce Flags" 2.1    Navigate to the path shown below: Computer>HKEY_LOCAL_MACHINE>SYSTEM>CurrentControlSet>Services>W32Time>Config At the right pane locate the  ‘ Announce Flags ’ file. And  Click  (left  click ) on “ Modify ”  Set the Value data to 5...

Bypass CUCM/Unity hardware check

รูปภาพ
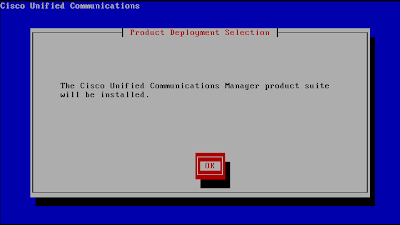
Bypass CUCM/Unity hardware check I was trying to install the UC 8.6.1 suite on my VMware ESXi.  I'm pretty savvy at VMware and UC, thus I didn't bother to download the OVA template from Cisco.  I created a VM with 75G hard drive and 2G RAM. I had no problem getting UCM installed.  However, when it came to Unity Connection, I realized that the option was not presented on  screen like it did in previous versions (see below). Maybe there's some magic in the OVA template.  So let's download it. Open up the OVA file with Notepad.  You'll see that the minimum hardware requirement is 4G RAM and 160G hard disk. If you're just testing it in the lab and want to save some hard disk space, you may choose "Thin Provision" while deploying the OVA.  VMware will dynamically allocate space as needed up to 160G.  ie. if the initial install occupies 75G, it'll only takes 75G physical space (even though the hard disk "looks like" 160G)...

Make a non-bootable ISO image bootable

รูปภาพ
Make a non-bootable ISO image bootable For whatever reason, Cisco only post "non-bootable" ISO images on CCO for download. In some urgent situations, you might need a bootable disc to recover the system (or your client/boss would shoot you in the head). Here's the procedure to make a non-bootable ISO image bootable. Before you continue, be aware that this procedure is NOT approved by Cisco. Neither Cisco nor I will be responsible for any loss caused by this.  Any bootable disc has to follow " El Torito " specification. No exception for Cisco discs. The only difference between a bootable disc and non-bootable disc is the "boot sector". Thus the solution is very simple - extract the boot sector from a bootable disc and inject it into a non-bootable disc. The boot sector is a very small file (usually less than 10k). And the boot sector is  usually  content independent (i.e. you may extract the boot sector from CUCM 7.1.3 and inject it into 7.1.5). ...

CISCO: Collaboration News