Bypass CUCM/Unity hardware check
Bypass CUCM/Unity hardware check
I was trying to install the UC 8.6.1 suite on my VMware ESXi. I'm pretty savvy at VMware and UC, thus I didn't bother to download the OVA template from Cisco. I created a VM with 75G hard drive and 2G RAM.
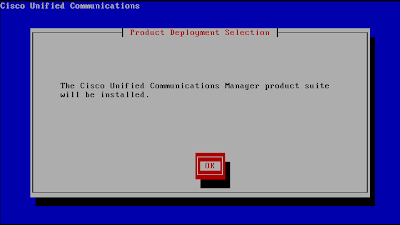
I had no problem getting UCM installed. However, when it came to Unity Connection, I realized that the option was not presented on screen like it did in previous versions (see below).
Maybe there's some magic in the OVA template. So let's download it.
 Open up the OVA file with Notepad. You'll see that the minimum hardware requirement is 4G RAM and 160G hard disk.

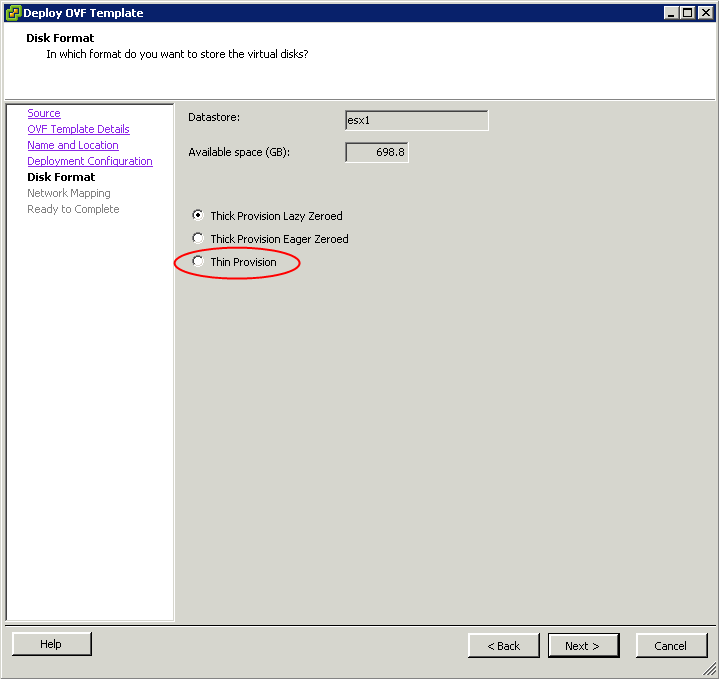
If you're just testing it in the lab and want to save some hard disk space, you may choose "Thin Provision" while deploying the OVA. VMware will dynamically allocate space as needed up to 160G. ie. if the initial install occupies 75G, it'll only takes 75G physical space (even though the hard disk "looks like" 160G). This is not recommended for production environment for performance consideration.

But if you're the kind of people that like to control everything, this is pretty annoying. Why can't it just install on a 75G disk? Ya, why not? Let's hack it.
On the installation disc, look for the folder "Cisco/Install/conf".

Open the file "callmanager_product.conf" and search for "Unity Connection VMware rule". A couple lines below, you'll see the line "NOT, VMware, *, *, *, *, *, *, *, *". Change it to "VAL, VMware, *, *, *, *, *, *, *, *". This will allow any virtual machine specification.

You may do the same if you want to use a physical server. For example, if you have an old 7825H server and want to install Unity Connection 8.6.1 on it, just change the line "NOT, 7825H, *, *, *, *, *, *, *, *" to "VAL, 7825H, *, *, *, *, *, *, *, *".
You may also change the sections for CUCM and CUCM BE so they have less restricted requirements.
Save the file to the disc (image). Boot from it. Now you see the Unity Connection is available as shown below.

By the way, UC 8.6 supports VMTools (finally). However the VMTools bundled with the install might not be up to date.

From CUCM CLI:

You may update the version from VM client.

The installation will take a while. During install, you'll see the VMTools status as "not running". This is normal.

When the install is completed, you'll see the version is updated.


I had no problem getting UCM installed. However, when it came to Unity Connection, I realized that the option was not presented on screen like it did in previous versions (see below).

Maybe there's some magic in the OVA template. So let's download it.


If you're just testing it in the lab and want to save some hard disk space, you may choose "Thin Provision" while deploying the OVA. VMware will dynamically allocate space as needed up to 160G. ie. if the initial install occupies 75G, it'll only takes 75G physical space (even though the hard disk "looks like" 160G). This is not recommended for production environment for performance consideration.
But if you're the kind of people that like to control everything, this is pretty annoying. Why can't it just install on a 75G disk? Ya, why not? Let's hack it.
On the installation disc, look for the folder "Cisco/Install/conf".

Open the file "callmanager_product.conf" and search for "Unity Connection VMware rule". A couple lines below, you'll see the line "NOT, VMware, *, *, *, *, *, *, *, *". Change it to "VAL, VMware, *, *, *, *, *, *, *, *". This will allow any virtual machine specification.

You may do the same if you want to use a physical server. For example, if you have an old 7825H server and want to install Unity Connection 8.6.1 on it, just change the line "NOT, 7825H, *, *, *, *, *, *, *, *" to "VAL, 7825H, *, *, *, *, *, *, *, *".
You may also change the sections for CUCM and CUCM BE so they have less restricted requirements.
Save the file to the disc (image). Boot from it. Now you see the Unity Connection is available as shown below.

By the way, UC 8.6 supports VMTools (finally). However the VMTools bundled with the install might not be up to date.

From CUCM CLI:
You may update the version from VM client.

The installation will take a while. During install, you'll see the VMTools status as "not running". This is normal.

When the install is completed, you'll see the version is updated.

From CUCM CLI:


ความคิดเห็น
แสดงความคิดเห็น